Hello,
Creating an animation by using frame-by-frame technique requires lot of work and attention because we have to draw every frame on our own .The term 'Tweening' means 'in between'.Tweening simply means going from one keyframe to another while taking small steps for each of the frames in between.
Flash has three types of Tweenings:
Motion Guide Tweenings:Moving objects from A to B along a customized path.
Tint Tweening:Graduated color changing an object.
Shape Tweening:Graduated change of one object into another.
So now I shall be telling you about what is motion guide.
Motion Guide meand moving you symbol in a predefined path such as curves or circles.I shall now tell you how to move Flash objects in circular,zig zag or curved paths using Flash motion guide.
For example you have to make a bird fly using a motion guide.
Step 1: Draw a ird or import it.
Step 2: Convert it to the symbol and delete it from the stage.
Move it to the library Panel.
Step 3: Drag a copy of bird to the stge.
Step 4: To enter a keyframe in frame 30.First click frame 30 in layer one on the timeline and then press F6.
Step 5: Right Click on frame 1 and choose Create Motion Tween.
Step 6: Right click on Layer 1.A pop-up menu appears.Flash now inserts a new layer on the top of layer 1,with the Motion Guide icon to the left of the layers name.
Step 7: Clixk on the Motion Guide Layer to make sure it is the active layer.
Step 8: Choose pencil from the toolbox. Make sure pencil mode is set to 'Smooth'.
With the pencil draw the line you want the bird to fly along.
Step 9: Now adjust the frame pointer ao that it points to frame 1.
Step 10: With the mouse, place the bird so that its center is at the neginning of your motion guide.(The center is indicated by a small + when selected). A black circle appears when the bird is attached to the motion guide.
Try zooming in or out if you just ant get the bird to snap to the guide.
Release the mouse button when the bird is snapped to the guide.
Step 11: Click from frame 30 and position the bird at the end of the motion guide just as you did in frame 1.
WOW!Congrats you have just created a motion giude tweening.The bird will now follow the motion guide when you play the movie.
Hope you understood everything that I told you.If you have any quires you can leave a comment or e-mail me at ranibhardwaj31@gmail.com .I will surly replay your quires.
Take Care and Thanks for reading!
Friday, July 17, 2009
Friday, July 10, 2009
Using Onion Skin Tool
Hello,
So today I will be teching you about how to use onion skin tool.Onion Skinning allows you to see a faint ghost image of the previous framee so you can see where you want to place the artwork for the next frame.This feature lets you to edit one keyframe while viewing as many frames before or after the current frame as you want.
Creating an Animation by using Onion Skin
Step 1:Start a New File and set Frame view to large.
Step 2:Turn on Onion Skin.Notice that the Start and End Onion Skin makers.

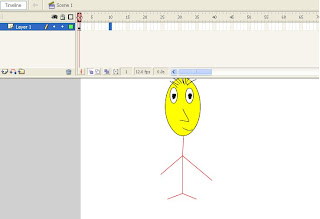
Step 3: Draw a Stick man which is shown below.
Step 4: In frame 2, Select Insert -->Keyframe,this will copy what was in the previous frame and paste in into the new keyframe.
Step 5: While editing frame 2,drag the end of one leg to move it to a different angle.This time,the position of the leg from frame 1 is visible but we can edit the contents of frame2.
Step 6: In frame 3,insert another keyframe. When you move the leg ,you can judge how much leg to the moved,based on the position of the leg in frame 2.
Step 7:Continue to insert keyframes one at a time. Make change in each new frame , then select Insert --> Keyframe again.
Step 8: When you have several frames, you can experiment with changing the both Start and End Onion Skin markers. By default, the markers are set to Onion 2 , meaning you can see two frames ahead and two behind.
So I hope you got to know how use Onion Skinning in Flash.If you have any problems in onion skinning you can leave a comment or e-mail me at ranibhardwaj31@gmail.com.
Thanks for reading.
So today I will be teching you about how to use onion skin tool.Onion Skinning allows you to see a faint ghost image of the previous framee so you can see where you want to place the artwork for the next frame.This feature lets you to edit one keyframe while viewing as many frames before or after the current frame as you want.
Creating an Animation by using Onion Skin
Step 1:Start a New File and set Frame view to large.
Step 2:Turn on Onion Skin.Notice that the Start and End Onion Skin makers.

Step 3: Draw a Stick man which is shown below.
Step 4: In frame 2, Select Insert -->Keyframe,this will copy what was in the previous frame and paste in into the new keyframe.

Step 5: While editing frame 2,drag the end of one leg to move it to a different angle.This time,the position of the leg from frame 1 is visible but we can edit the contents of frame2.
Step 6: In frame 3,insert another keyframe. When you move the leg ,you can judge how much leg to the moved,based on the position of the leg in frame 2.
Step 7:Continue to insert keyframes one at a time. Make change in each new frame , then select Insert --> Keyframe again.
Step 8: When you have several frames, you can experiment with changing the both Start and End Onion Skin markers. By default, the markers are set to Onion 2 , meaning you can see two frames ahead and two behind.
So I hope you got to know how use Onion Skinning in Flash.If you have any problems in onion skinning you can leave a comment or e-mail me at ranibhardwaj31@gmail.com.
Thanks for reading.
Subscribe to:
Comments (Atom)


