Hey guys, I am back again after a very long break but now I assure you that it wont happen again.
So today I am going to tell you guys how to use the magnetic lasso tool. Follow the steps below and you will be perfect!
Step 1: Select the Magnetic Lasso Tool from the Toolbar.
Step 2: Set any desired option from the options bar.
Step 3: Click to set the first endpoint of the selection.
Step 4: To draw a freehand segment, move the mouse pointer along the edge you want to trace. (You don't have to hold down the mouse button, although you can if you like.)
Step 5: As you move the pointer, the selection will automatically snap to the strongest edge in the area around the pointer, based on the Width set in the Options Bar. Periodically, intermediate points are added to the selection border. While tracing the edge, click to add a point if needed.
Step 6: If you want to switch to either the regular Lasso Tool or the Polygonal Lasso Tool, hold the Alt key. At this point, dragging the mouse will let you draw freehand borders add clicking will let you draw straight-line segments.
Step 7: Close the selection border by double-clicking the mouse.
So I hope you understood well, if you have any problems don't hesitate just leave a comment and I will help you back!
Wednesday, November 25, 2009
Thursday, October 15, 2009
Selection And Modification Tools In Photoshop
src="http://pagead2.googlesyndication.com/pagead/show_ads.js">
Hello,
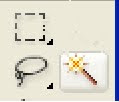
Today Harry told me that he wanted know how what are selection and modification tools in photoshop and how to use them. I told him what types of tools they are and where to use them. He got to very impressed that he wants to learn more. I explained him that photoshop provides three simple tools for selection: Marquee, Lasso and Magic Wand. They are located on he top of the toolbar. In addition, you can use commands on the Select menu.
The selection tools allow you to select a portion or a subset of an
image to work on. Most of Photoshop's other tools and filters can then be applied to this selected area, altering its color, shape, texture, position and/or other attributes, while leaving the rest of the image untouched.
The Marquee Tools are used to select a specific regularly shaped area. The marquee tools include the Rectangular, Elliptical, Single Row and Single Column Marquees.
The Lasso Tools are used to select an irregular area. These tools include the Lasso Tool, the Polygonal Lasso Tool and the Magnetic Lasso Tool.
The Magic Wand is used to select areas of an image based upon color. The Magic Wand does not have additional tools.
All of the selection tools may be used individually or in conjunction with each other to select exact areas of images. The Options Bar allows you to choose to add to or subtract from a previous selection.
If you choose New Selection, any currently active selection will go away.
If instead you would like to add to the current selection, or subtract from it, make that choice in the Options Bar. You can even choose to select an area formed by the intersection of your selections.
Thanks For Reading!!
Friday, October 9, 2009
Selecting Gradient Colors
Hello,
Harry asked me that he was not able to understand the concept of how to select the gradient colors. I told him that you now how to select the gradient tool, (refer to the previous blogs)the gradient options appear on the Options Bar. The color bar allows you to set the, gradient colors. If you click on the pull down menu, you
you can select any of the displayed color combination. (If you hold your mouse over any of the choices, you will see a text description of it.) The upper left hand corner always displays the default combination, a gradient from the foreground color to the background color. By setting your foreground and background colors on the toolbox, you can easily define your own simple gradient.
The circle button with the black arrow (circled in red here) provides a fly-out menu with more gradient options. This menu lets you load more gradients, save modified gradients, gradients shapes, rename gradients and reset the gradient selection to Photoshop's default values. The bottom grouping is a list of other gradients families that can be used if desired by the user.
Editing Gradient Colors
If you want to make changes in one or more of the colors in your chosen gradient, you can click on it the options bar to open the Gradient Editor dialog box. For example, clicking on this gradient.
This will display this Gradient Editor dialog box :
The Color Stops appearing below the gradient marks of the each colors in the gradient. To change a color, double click on its Color Stop; the color picker will open, allowing you to select a new color. You can also add more Color Stops by clicking between the existing Stops. To remove a color, simply drag its Color Stop away from the gradient.
Saving an Image
Now that you've changed the image, let's save it: select Save from the File menu. Photoshop should select the directory from which the image was loaded and should choose Photoshop's PSD file format as the image format.
Thanks For Reading!!
Sunday, October 4, 2009
Knowing Gradient Styles
Hello,
Yesterday Bella told me that she is very confused with various types of Gradient styles.Then I told her in a simple way that when the Gradient tool is selected, a series of five style buttons appear on the Options Bar:
These buttons represent various gradient styles:
* Linear * Radial *Angular *Reflected * Diamond
The description of each style, with an example of which is shown below. To help you visualize how each gradient was
created, the mouse action is superimposed on the gradient:
* The black triangle indicates the center point.
* The dashed line indicates the selection line.
* The red triangle indicates the end point.
In each case, the mouse was dragged from the center point along the selection line to the end point, then released.
The Linear Gradient- This option can create vertical, horizontal and diagonal gradient.
For vertical gradients, draw a horizontal selection line (that is, drag the mouse left to right or vice verse)
For horizontal gradients, draw a vertical selection line (that is, drag the mouse up or down)
For diagonal gradients, draw a diagonal selection line (that is drag the mouse diagonally)
The Radial Gradient - This option creates circular gradients. Start the mouse drag at the point where you want the center of the gradient to be ; release the mouse button where you want to the outermost circle of the gradient to be.
The Angular Gradient - This option creates a circular sweep of blended color. Think of it as a clock face with a sweep second hand that the gradient flows from as it goes around. Start the mouse drag where you want the center of the clock free to be, drag the selection line as if you were drawing the starting point of the clock's second hand. When the mouse is released, the second hand sweeps counter-clockwise around the center point and stops when it returns to where it began. The sweep begins with the left-most color on the color bar and ends up with the right-most color.
The Reflected Gradient - This option works the same way as the Linear Gradient, but it creates a mirror image as well. In other words, when you create the selection line, the gradient flows out in both directions from the center point, rather that just in the direction you drag the mouse.
Subscribe to:
Posts (Atom)